
Hanging a shelf, tightening a door handle, sanding a shutter before repainting: we often find ourselves facing a small home project without knowing which tool to grab. Assembling a coherent first toolbox avoids buying tools piecemeal and ending up with unsuitable equipment. Here are the DIY tools to gather to cover the vast majority of common tasks at home.
Interchangeable or corded battery: the choice that determines everything else
Before making any list, we must settle a question that most guides overlook: corded or cordless. A beginner who buys a cordless drill-driver, then a sander from another brand, ends up with two chargers, two battery formats, and no compatibility.
The majority of manufacturers offer a common battery platform for several tools. In practice, a single battery can power a drill, jigsaw, and sander, provided you stay within the same range and voltage. Before buying a second cordless tool, check the exact compatibility between generations and voltages, as it is not always guaranteed within the same brand.
Regulation (EU) 2023/1542 now governs the information and collection of batteries. The chapter on extended producer responsibility applies from August 18, 2025, meaning manufacturers must facilitate battery replacement and recycling. Before investing, ensure that the battery can be replaced and that spare parts are available. A tool with a battery soldered to the block will end up at the dump at the first sign of weakness.
To delve deeper into the topic of basic equipment, a practical guide on Univers du Bricolage details the selection criteria tool by tool.
Hand tools for home DIY: the foundation of the toolbox
We start with hand tools, those that are used for every intervention, even minor ones. There’s no need to accumulate twenty: a tight selection covers almost all the needs of a household.

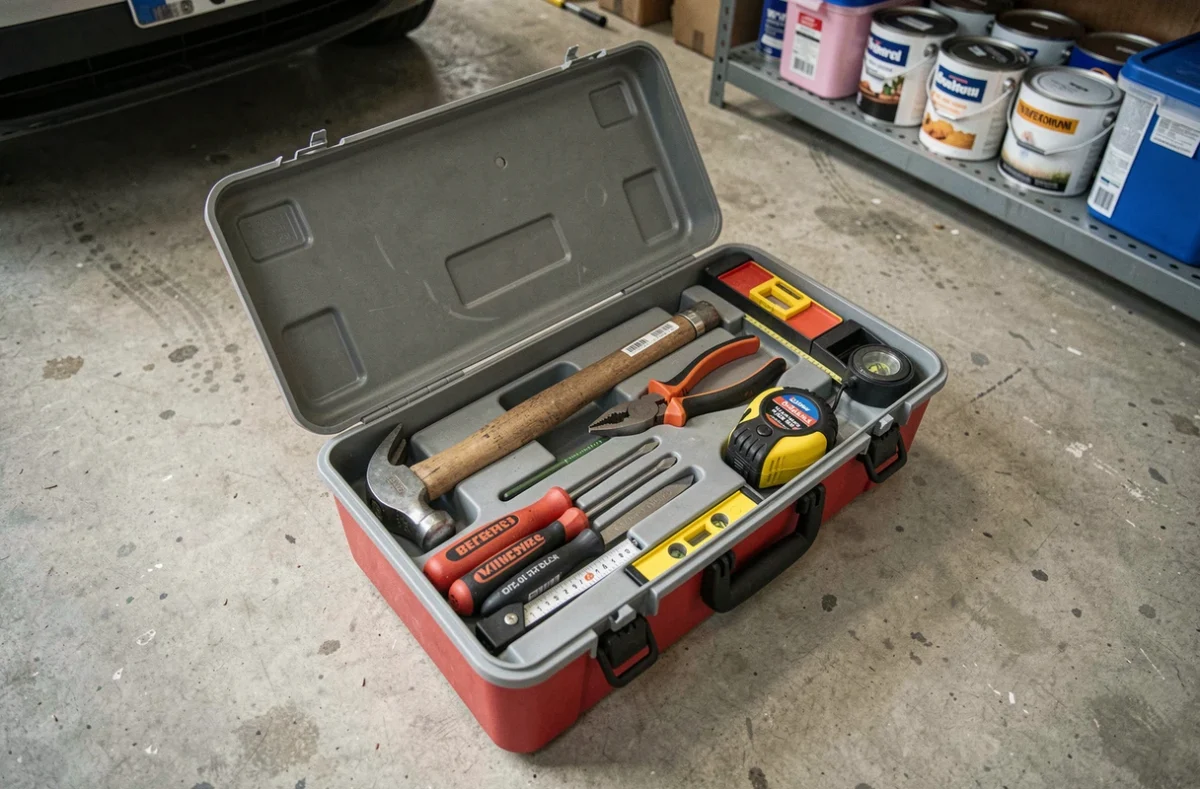
- A set of screwdrivers (flat and Phillips, with at least three sizes of each) allows you to disassemble outlets, switches, flat-pack furniture, and common appliances. An interchangeable bit model saves space, but fixed screwdrivers provide better torque.
- A carpenter’s hammer (flat head on one side, claw on the other) is used to drive in dowels, hammer in nails, and adjust wood joints. Avoid the formwork hammer, which is too heavy for home use.
- A combination pliers and a cutting pliers cover light plumbing (tightening a fitting, holding a nut) and electrical wiring. The cutting pliers easily cut through sheaths and clamps.
- A five-meter tape measure and a spirit level allow you to measure, mark, and check plumb. Hanging a frame crooked is the kind of detail that annoys for months.
- A retractable blade cutter and a hand saw complete the kit. The hand saw cuts battens, baseboards, and small sections of wood without needing to plug anything in.
All these tools fit into a compact toolbox and represent a modest investment. Opt for ergonomic handles and decent steels rather than budget sets that wear out after the third use.
Drill-driver and sander: the two electric tools to acquire first
When starting out, two power tools are enough to cover the majority of projects: the drill-driver and the sander.
Drill-driver: the Swiss army knife of the DIYer
It screws, unscrews, drills wood, thin metal, and, with a hammer function, light concrete. For home use, a cordless drill-driver between 12 V and 18 V provides enough power to assemble furniture, secure a curtain rod, or install wall brackets.
Adjust the torque (the clutch selector on the chuck) before each operation. A setting that is too high on a wood screw splits the piece. A setting that is too low slips on metal. This small gesture, often overlooked, prevents most mishaps.
Vibrating or orbital sander: preparing surfaces
Repainting a shutter, stripping a thrifted piece of furniture, smoothing a filler: the sander comes into play whenever you touch a surface. The vibrating sander (rectangular pad) is suitable for flat surfaces and small budgets. The orbital sander (round pad) provides a more uniform finish and tackles thicker layers better.
The choice of abrasive grit matters more than the choice of the machine. Start with a coarse grit to rough up, then switch to a fine grit to smooth. Storing three or four different grits avoids trips to the store in the middle of a project.
Safety equipment for home DIY
We talk a lot about tools, rarely about protection. A splinter in the eye or a cut from a metal burr can turn a productive Saturday into a trip to the emergency room.
Three pieces of equipment change the game. Wide-branch safety glasses stop wood, metal, and concrete splinters. Well-fitting work gloves protect the hands without hindering grip (if too loose, they catch on drill bits). An FFP2 dust mask filters fine particles during sanding or drilling in masonry.
For electrical work, even basic tasks (replacing a switch, adding an outlet), always turn off the relevant circuit breaker and check for voltage absence with a phase tester. This small tool costs a few euros and eliminates the risk of electric shock.
Rent before buying: an underestimated strategy for specialized tools
A circular saw, a hammer drill, a heat gun: these specialized tools are sometimes only used once a year. Before investing, renting from a hardware store or between individuals allows you to test the tool in real conditions and confirm that you will have recurring use.
This approach has another advantage: you handle professional equipment, often more efficient than entry-level, and discover your own needs. After two or three rentals, you know precisely which tool deserves a purchase and which will stay at the back of the garage.
The quality of a hand tool is verified over time, while that of a power tool depends on the availability of consumables and spare parts. Gradually building your toolbox, starting with hand tools, then adding a drill and sander, remains the most economical and educational path to start DIY at home.